ランダムウォークをDirectXを利用して可視化してみる
2次元ランダムウォーク
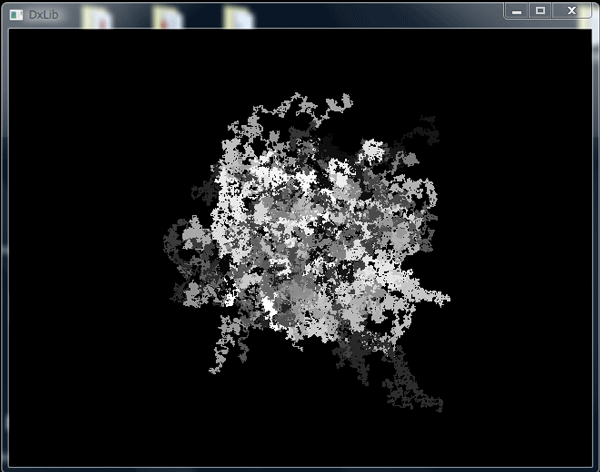
100個の粒子をランダムウォークさせて、逐次結果をプロットする。
粒子の色は、次のRGBの式で表す。
R = 255×(粒子の番号)
G = 255×(粒子の番号)
B = 255×(粒子の番号)
つまり、白から黒まで濃淡で区別している。

VisualC++ + DirectX のソース
注意:以下のソースには、無駄なインクルードがあります。 ※DirectXの利用の仕方はこちらをご覧ください。
/*
DLA100
*/
#include <math.h>
#include <stdlib.h>
#include <time.h>
#include <fstream>
#include <sstream>
#include <iostream>
#include <string>
#include "mt19937ar.h"//メルセンヌ・ツイスター

#include <cstdio>
#include <iomanip>
#include <stdio.h>
#include <direct.h>
#include "DxLib.h"
using namespace std;

double PI = 3.14159265358979323846;
double e = 2.7182818284590452354;
int dimension = 2;//次元
int width = 640;
int height = 480;
//備考:画面サイズはデフォルトで、640×480

class Perticle{
public:
	int D[10];//10次元までの座標
	Perticle();
    void Step(){
		double r = genrand_real1();
		int nn = int(dimension*r);
		if(genrand_real1()>0.50) D[nn]++;
		else D[nn]--;
	}
};
Perticle::Perticle(){
	for(int j=0; j<dimension; j++ ){
	    D[j] = 0;
	}
	D[0]= width/2;
	D[1]= height/2;
}
// プログラムは WinMain から始まります
int WINAPI WinMain( HINSTANCE hInstance, HINSTANCE hPrevInstance, LPSTR lpCmdLine, int nCmdShow )
{
	ChangeWindowMode(TRUE);
	if( DxLib_Init() == -1 ) return -1 ;  // DXライブラリ初期化処理

	init_genrand((unsigned)time(NULL));
	//メインループ
	Perticle p[100];
	int stop=1000000;
	while(ProcessMessage()==0 && CheckHitKey(KEY_INPUT_ESCAPE)==0){
		for(int i=0; i<100; i++){
			p[i].Step();
			DrawPixel( p[i].D[0] , p[i].D[1] ,  GetColor(255*(i+1)/100,255*(i+1)/100,255*(i+1)/100) ) ;
		}
		ScreenFlip();
	}

	DxLib_End() ;  // DXライブラリ使用の終了処理

	return 0 ;  // ソフトの終了
}
5次元ランダムウォーク
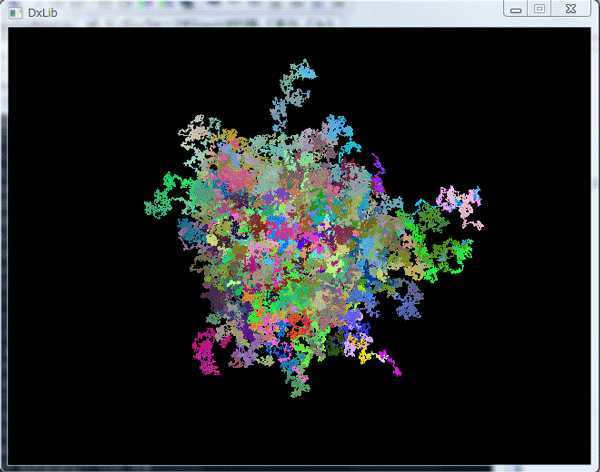
100個の粒子をランダムウォークさせて、逐次結果をプロットする。
1次元目、2次元目は、x,y座標。
3次元,4次元,5次元目は、粒子の色で表現する。
粒子の色は、次のRGBの式で表す。
R = 255/2 +(3次元の値)
G = 255/2 +(4次元の値)
B = 255/2 +(5次元の値)
つまり、初期値は灰色。

VisualC++ + DirectX のソース
/*
DLA100
*/
#include <math.h>
#include <stdlib.h>
#include <time.h>
#include <fstream>
#include <sstream>
#include <iostream>
#include <string>
#include "mt19937ar.h"

#include <cstdio>
#include <iomanip>
#include <stdio.h>
#include <direct.h>
#include "DxLib.h"
using namespace std;

double PI = 3.14159265358979323846;
double e = 2.7182818284590452354;
int dimension = 5;
int width = 640;
int height = 480;
//備考:画面サイズはデフォルトで、640×480
ofstream ofs1( "test.data" );

class Perticle{
public:
	int D[10];//10次元までの座標
	Perticle();
    void Step(){
		double r = genrand_real1();
		int nn = int(dimension*r);
		if(genrand_real1()>0.50) D[nn]++;
		else D[nn]--;
	}
};
Perticle::Perticle(){
	for(int j=0; j<dimension; j++ ){
	    D[j] = 0;
	}
	D[0]=width/2;
	D[1]=height/2;
	D[2]=int(255/2);
	D[3]=int(255/2);
	D[4]=int(255/2);
}

// プログラムは WinMain から始まります
int WINAPI WinMain( HINSTANCE hInstance, HINSTANCE hPrevInstance, LPSTR lpCmdLine, int nCmdShow )
{
	ChangeWindowMode(TRUE);
	if( DxLib_Init() == -1 ) return -1 ;  // DXライブラリ初期化処理

	init_genrand((unsigned)time(NULL));

	//メインループ
	Perticle p[100];
	int stop=1000000;
	while(ProcessMessage()==0 && CheckHitKey(KEY_INPUT_ESCAPE)==0){
		for(int i=0; i<100; i++){
			p[i].Step();
			DrawPixel( p[i].D[0] , p[i].D[1] ,  GetColor(p[i].D[2], p[i].D[3], p[i].D[4]) ) ;
		}
		ScreenFlip();
	}

	DxLib_End() ;  // DXライブラリ使用の終了処理

	return 0 ;  // ソフトの終了
}
今後の予定
さまざまな、ランダムな図形のフラクタル次元を求める。


